This page is a working acceptance checklist, not a product description. Copy the table into your purchase file, add your part numbers and test limits, and use the same document at factory acceptance and again at commissioning. It covers machine and safety documents, accuracy and tension evidence, sample testing, and the sign-off, spares and support terms that are often forgotten until a machine is already on the floor. It deliberately names no standard numbers or certifications, because those depend on your destination market and on the exact configuration. The measurement logic behind each line is described in our guide to evaluating stator winding machine accuracy.
What this checklist covers
An acceptance checklist has one job: turn a claim into a test someone can repeat. Every line below has an evidence item and a place to record the result. Leave the limit column blank if you do not yet know your tolerance, rather than copying a number from a brochure. Fill it in with the motor or coil team before the purchase order, using your own wire and your own test method.
Split the list into two passes. Factory acceptance (FAT) happens at the supplier's site with their instruments and your parts; site acceptance (SAT) repeats the same measurements after installation, with comparable instruments and the same reference parts. A result that cannot be repeated at your site is not an acceptance criterion, it is an observation.
Machine and safety documents
Start with identification and the safety file: the model and serial number, the declaration or equivalent statement, the risk assessment summary, guard and interlock description, emergency stop circuit, wiring diagram and the electrical ratings of installed components. Check that the documents describe the configuration actually quoted, including any added feeder, enclosure or tester. Then walk the machine with the file in hand and confirm the devices listed are physically present.
Add the operational documents to the same pass: manuals in a language your site uses, the parameter sheet for the delivered program, the backup and restore procedure, and the spare parts list with part numbers. A folder with no revision history or no identifiable machine is a gap to record before sign-off, not a detail to chase after installation.
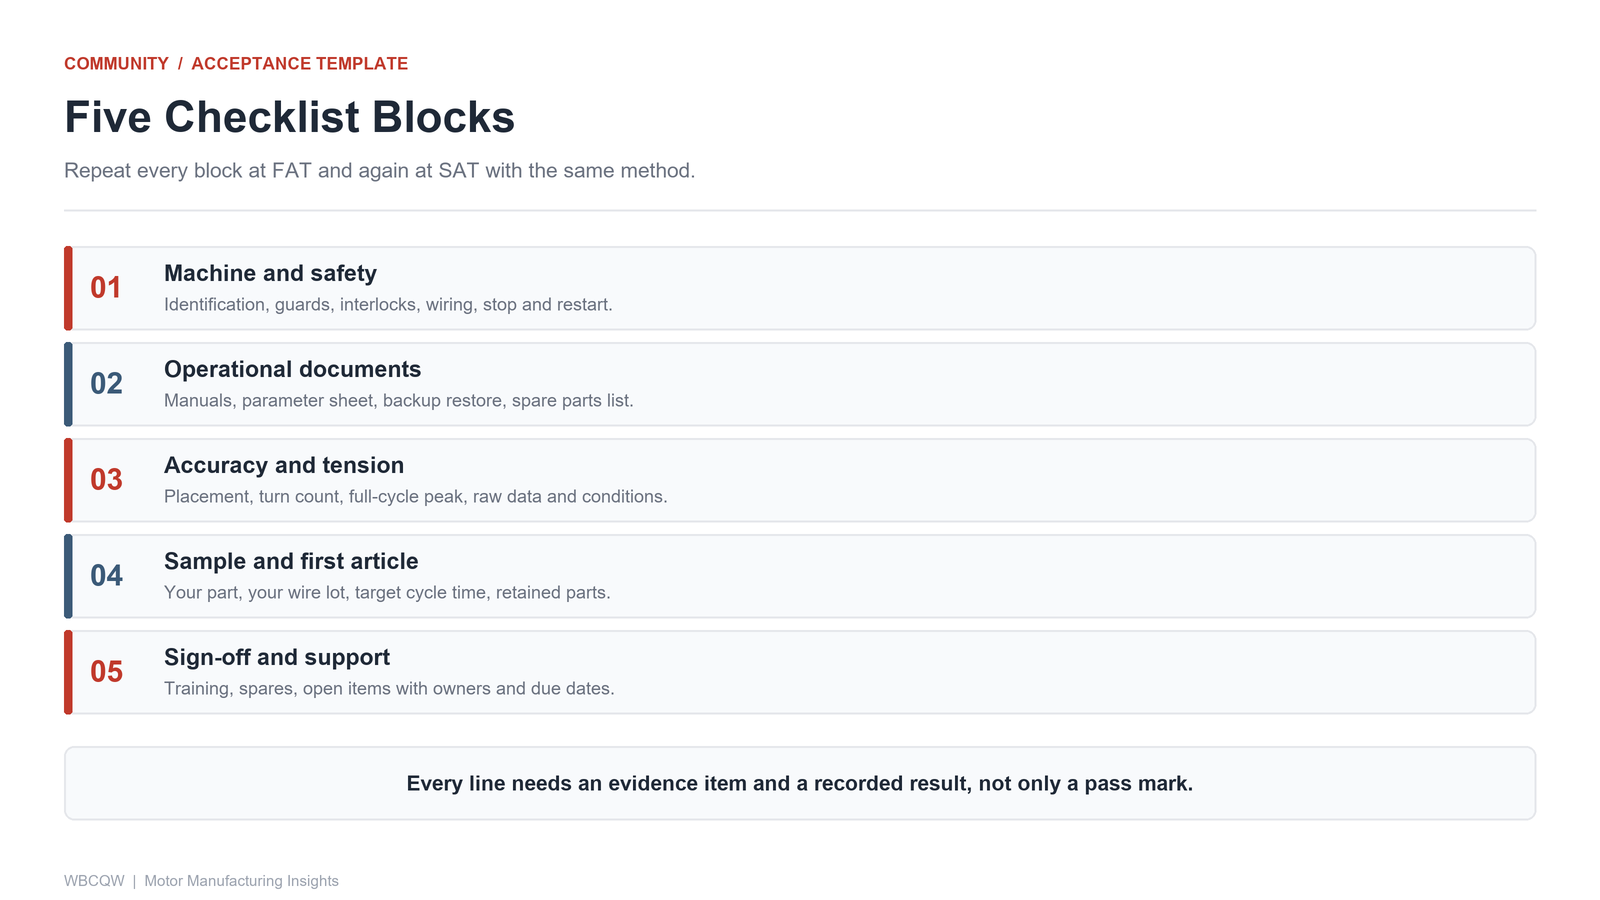
Fig. 1 - Five checklist blocks, each repeated at FAT and again at SAT. Illustrative diagram, not a product photograph.
Accuracy, tension and sample evidence
This is the part of the checklist that most often collapses into a single "accuracy: pass" line. Instead, list the individual measurements: positioning or placement, turn-count verification, tension setpoint and full-cycle peak including start-up and traverse reversal, and the dimensional or electrical result on your own part. For each, state the instrument, its calibration status, the test conditions, the sample size and the raw data required rather than a pass mark alone.
Require a sample wound from your wire lot, on your bobbin or stator, at your intended cycle time. Keep the sample parts and the setup sheet together. At SAT, repeat the same measurements with the same method and compare against the retained references. Where a result differs, record the difference and its cause before signing; a small, explained difference is more manageable than an unexplained perfect match.
| # | Checklist item | Evidence to file | FAT | SAT |
|---|---|---|---|---|
| 01 | Model, serial and configuration match | Nameplate photo, declaration | [ ] | [ ] |
| 02 | Guards, interlocks and stop circuit | Risk summary, wiring diagram | [ ] | [ ] |
| 03 | Emergency stop and restart mid-cycle | Witnessed test record | [ ] | [ ] |
| 04 | Manuals and delivered parameter sheet | Revision-controlled copies | [ ] | [ ] |
| 05 | Program backup and restore demonstrated | Restore record, version | [ ] | [ ] |
| 06 | Spare parts list with part numbers | List, wear intervals | [ ] | [ ] |
| 07 | Placement or positioning measurement | Method, instrument, raw data | [ ] | [ ] |
| 08 | Turn-count verification | Count log, program revision | [ ] | [ ] |
| 09 | Tension setpoint and full-cycle peak | Full-cycle trace or gauge record | [ ] | [ ] |
| 10 | Sample wound on your part and wire lot | Retained part, setup sheet | [ ] | [ ] |
| 11 | First-article inspection at target cycle time | Results with conditions | [ ] | [ ] |
| 12 | Sustained run, stop and scrap log | Run log, reject reasons | [ ] | [ ] |
| 13 | Training completed and operators named | Signed training record | [ ] | [ ] |
| 14 | Spares, support and open-item list | Owners and due dates | [ ] | [ ] |
Sign-off, spares and adapting the template
Finish with the commercial and support items: spare parts handed over, training completed and operators named, response and commissioning terms recorded, and an open-item list with an owner and a due date for every gap. Sign the same checklist version at FAT and SAT, and reference it in the technical agreement so the two passes are comparable.
Adapt the table freely. For a fine-wire application, expand the tension and wire-path lines; our process troubleshooting guide describes the failure modes worth recording. For an integrated cell, add the interface and data-handoff tests from your own line specification. The limit of any template is that it records what was agreed, not what will happen over the next two years. Keep the retained samples and the baseline, because the checklist only becomes useful when a later deviation can be compared with the day the machine was accepted.